So, you want to purchase a VPN. We get you, we are all in the same boat, after all. Large corporations, governments, and even your ISP (Internet Service Provider) are spying on you, whether you like it or not. Their goal? To learn as much about you and your habits online, and thus keep tabs on you, extract profit, and simply decide their next course of action. To hide your identity and browsing habits, you need to connect to a Virtual Private Network. We already explained what is VPN and why you should use it. Let’s now see how to buy VPN and where.
Factors to consider before Buying a VPN service
VPNs are instrumental to our online health and privacy. Hence, it is paramount that one understands what service provider to employ. Before purchasing a VPN, sufficient research is a must. Hence, we are here to make it easier for our readers by highlighting some of the factors that should be considered before investing in a VPN service. These factors include the following:
Reasons behind the purchase
One of the most important factors is the motivation behind purchasing a VPN. Why you need a VPN might actually help with what VPN to get. If you solely want a VPN for light browsing activities or want to bypass a particular website, then even a free VPN extension may do the trick. On the other hand, if your profession demands online security and stringent privacy, you’d have to opt for a top-tier service provider.
Features being offered
All things aren’t created equal. And so do VPNs. A VPN differs in the quality and quantity of the features offered. Hence, you must take note of what the service provider is claiming and what it is actually offering. The most important features to heed, security and privacy-wise, are the encryption used, the VPN protocols employed, the logging policy adopted, and the network strength. These are the basics.
Customer support’s response and knowledge
Lastly, the thing one should emphasize is the attitude of the customer support team. VPNs are highly technical, albeit all the user has to do is click on a button for it to initiate a connection. But there are times when those connections fail, or the VPN straight up doesn’t perform what it promised. There are even times when you no longer want to continue with the same service and want a refund.
Responsive and knowledgeable customer support is crucial in such cases. Hence, go for reputed companies that have tried and tested support teams who offer 24/7 help.
Which VPN to choose?
The list of VPN providers is long, and there are new ones are entering the business regularly. You might have heard of several VPN myths that might alter your choice. Choosing one out of many can be hard, but will ultimately come down to the feature it has, and others don’t. Or, it could be that it simply does something much better than its competitors, such as improved VPN speed. In our opinion, at a minimum, a VPN provider must have a zero-log policy, 256-bit encryption, a good reputation, and at least a few dozen servers across the globe.
| Criteria | Importance | Recommendation |
|---|---|---|
| Security | High | NordVPN, ExpressVPN, CyberGhost |
| Privacy | High | Private Internet Access, ProtonVPN, Surfshark |
| Speed | High | ExpressVPN, NordVPN, Surfshark |
| Server Network | Medium | NordVPN, ExpressVPN, CyberGhost |
| Simultaneous Connections | Medium | Surfshark, Private Internet Access, CyberGhost |
| User-Friendly Interface | Medium | ExpressVPN, NordVPN, CyberGhost |
| Customer Support | Medium | NordVPN, ExpressVPN, Private Internet Access |
| Price | Low | Private Internet Access, Surfshark, CyberGhost |
Steps required to buy VPN
We will use NordVPN for demonstration purposes. This is because they offer the most comprehensive list of payment options, plenty of servers, and a good reputation in the industry. For example, they offer the option of paying with cryptocurrencies, just like Surfshark. Others, such as ExpressVPN, offer the same, but only Bitcoin.
- Visit NordVPN Checkout.
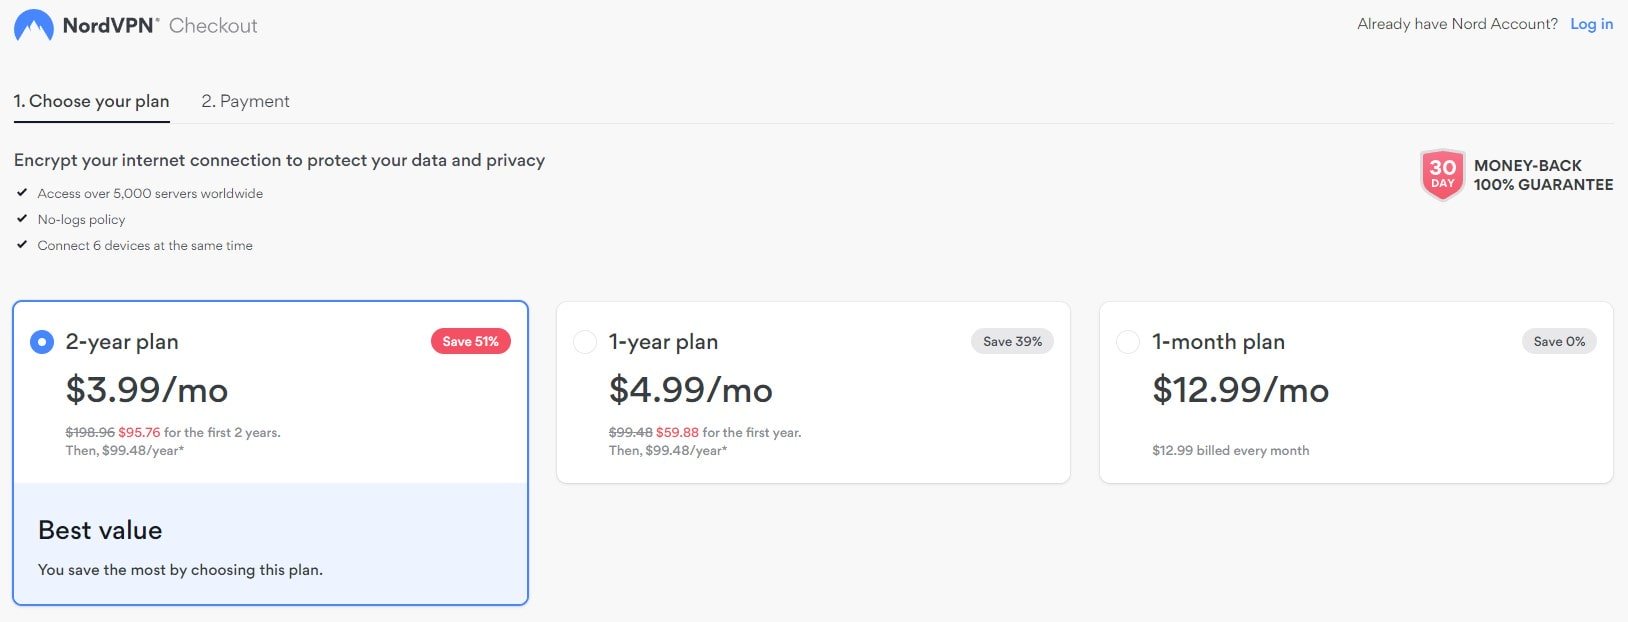
- With NordVPN, you have a choice of 3 subscription plans, 1-month, 6-month, and 1-year plan.Other VPN providers might offer 4 plans, often a 2-year or 3-year one as the 4th.
- Choose the plan that fits your needs and budget.
- The more long-term you plan, the less you will have to pay. Keep in mind, “billed annually” means that while you’ll get a large discount when split into months. However, you have to pay the full amount upfront.
- Optional. Scroll to the bottom of the page, and click on $ USD in the bottom left corner. You can see prices in another currency such as EUR, GBP, or YPY.
- You can choose additional features or services, such as NordPass and NordLocker.With other providers, you might get a choice of adding paid features such as dedicated IP, Ad-block, Identity Leak Alert, and others.
- If you have a discount coupon, click on Got coupon? in the bottom left corner.
- Click on Continue to Payment.
- Choose the payment method by clicking on either Credit Cards or Crypto Currencies.
- For both, you need to choose your country from the drop-down list for tax purposes.
- Under Create account, enter your e-mail address.
- For Credit Cards, enter your first and last name, card number, expiration date, CVV on the back of the card, and the postal code of your city. This kind of beats the purpose of staying anonymous.
- We recommend going with Crypto Currencies. It takes a lot more effort to set up a wallet, but as you can see, only your e-mail address is required. The transaction information will exist, but it’s extremely hard or outright impossible to link with your identity if configured right. You can use Bitcoin, Ethereum, or Ripple to pay, in this case.
- Click on Continue/Continue to CoinPayments.
- After they successfully charge your card, you will set up your NordVPN account with a username and password.You have a 30-day money-back guarantee if you don’t like the VPN. In that case, choose another paid VPN provider, or even give any of the free VPN services a try.